
 Click here to see all of our Software Training Courses
Using Adobe Photoshop and Adobe InDesign together
In This tutorial we are going to have a lok at the process of cutting out a tricky image in Adobe Photoshop and then placing it in to Adobe InDesign using the text wrap feature.
This is an intermediate/advanced tutorial so you may wish to have a look at my previous tutorials on how to use the Pen Tool to get you up to speed with the tricky Pen Tool.
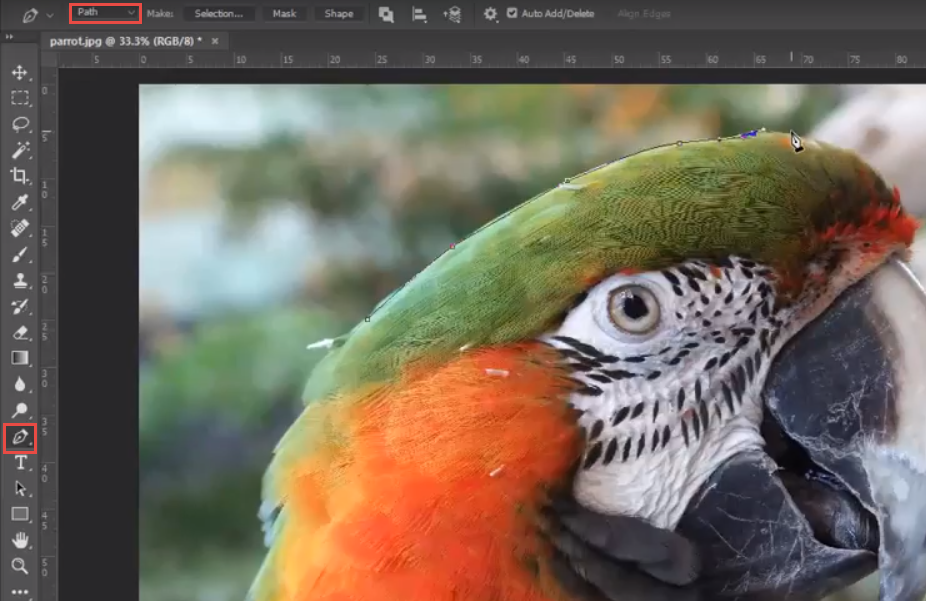
We are going to start in Adobe Photoshop by opening up our image and selecting the Pen Tool, importantly before we start drawing the path we need to make sure that the Pen Tool is set on ‘Path’ in the control bar at the top of the Adobe Photoshop Workspace. If the Pen Tool was set to Shape in Adobe Photoshop we would start creating a Shape layer which we don’t need in this instance.
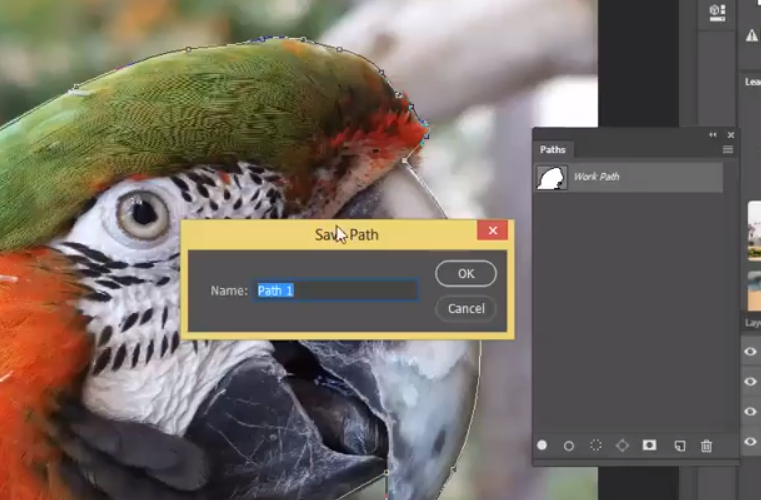
Once we are happy with the Path around the image (we can adjust the anchor points with the direct selection tool if needed) we need to save our Path in the Adobe Photoshop Paths Panel (Window > Paths), just select the path in the panel then double click to name and save the path.
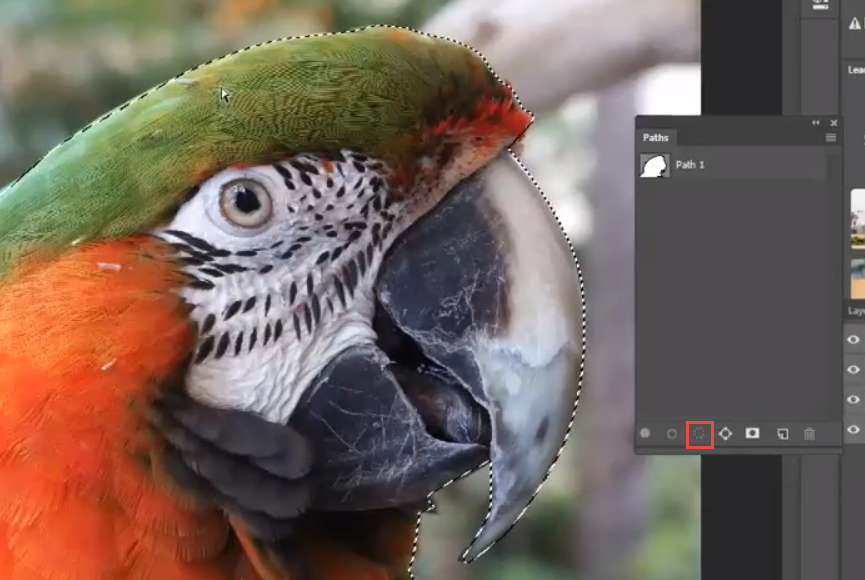
Once the path is saved we can make a selection from this path by clicking on the circle at the bottom of the Paths panel ‘Load Path as a Selection’ this will then create an accurate selection around our image in Adobe Photoshop.
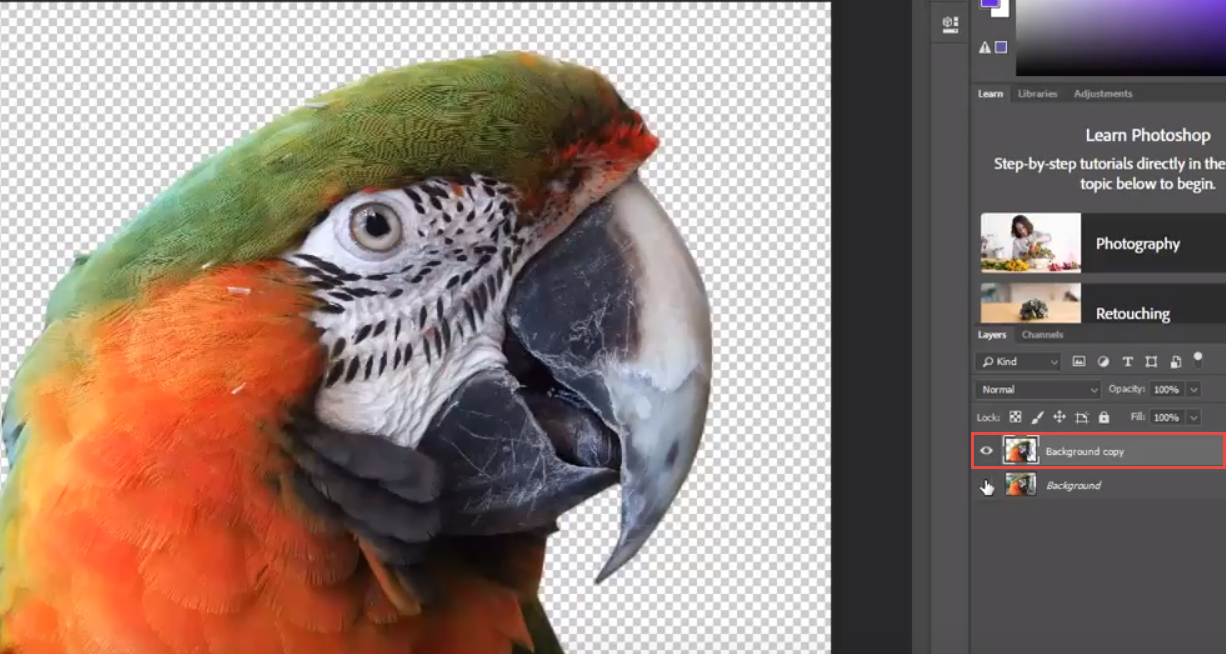
We can now copy and paste the image in to another Adobe Photoshop file but the selection will be very sharp, very much like it was cut out with a pair of scissors, we want the selection to look a lot more natural so we are going to use the ‘Select and Mask’ feature, this used to be called ‘Refine Edge’ but Adobe have renamed it and made it a lot more useful for softening the edges up in our cutouts.

To access the ‘Select and Mask’ go to Select > Select and Mask we then enter a different window.
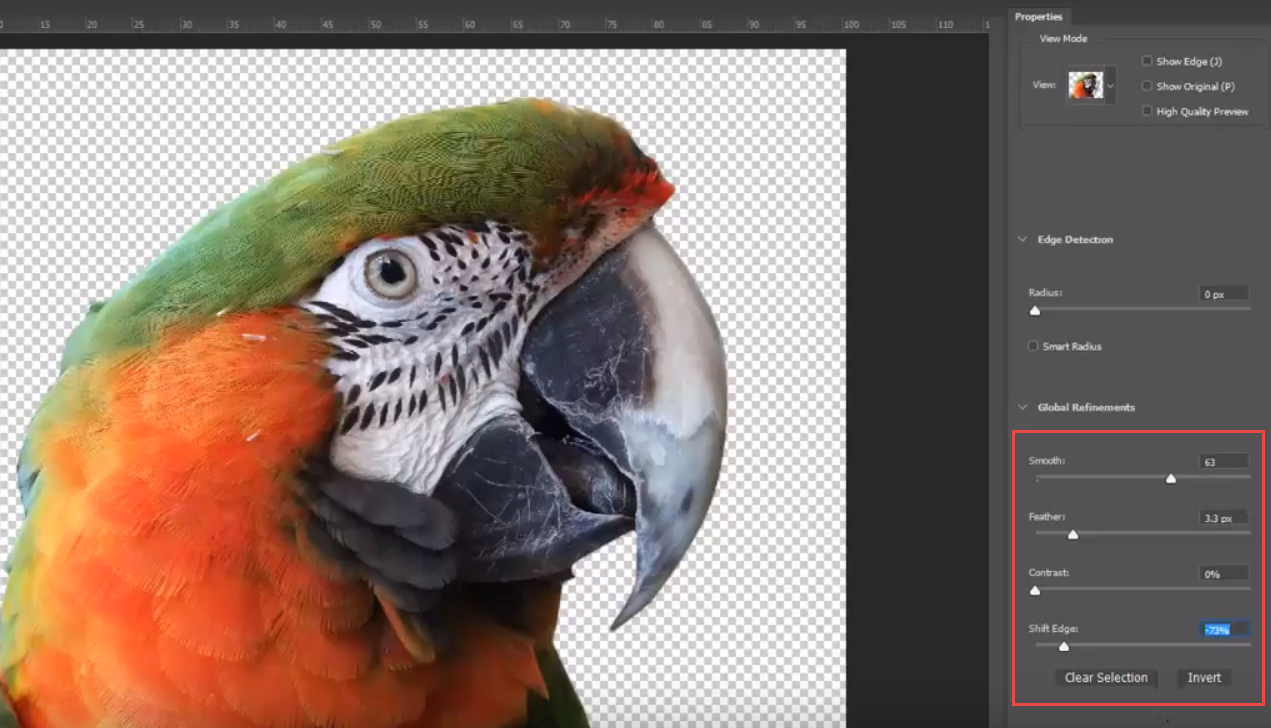
From the Select and Mask window we have a few options for softening out the edge of our Adobe Photoshop selections. We have ‘Smooth’ which will get rid of any jagged pixels which may still be present around the edges, we can ‘Feather’ which will fade the edges slightly to get away from the sharp cut out look that we are trying to avoid and we have ‘Shift Edge’ which will move the selection in or out by a number of pixels which helps to remove any unwanted background or reflections left in our image.
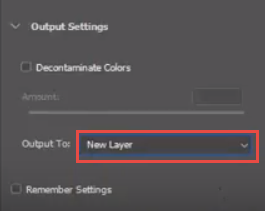
Underneath the options for refining the edge of the selections there is an ‘Output Settings’ option with this we are going to change the ‘Output To’ option over to ‘New Layer’ this will automatically cut out our image and place it in a new Adobe Photoshop Layer above the original background image.
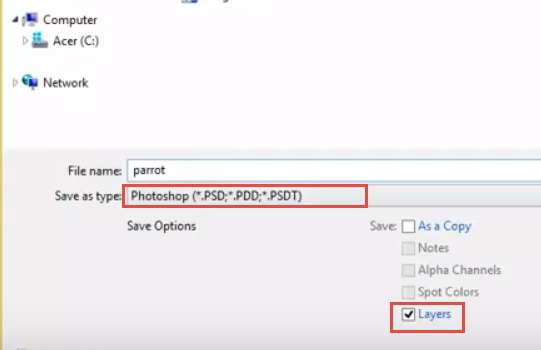
We are now going to save this file to use in Adobe InDesign, when we File > Save we can save the file in the native Adobe Photoshop format which is .PSD as Adobe InDesign can understand this perfectly and also by saving it in this file format it will preserve the transparency and not put a white background in as it would if we saved the image as a .JPEG. We can place Adobe Photoshop files directly in to Adobe InDesign with multiple layers with no issue at all.
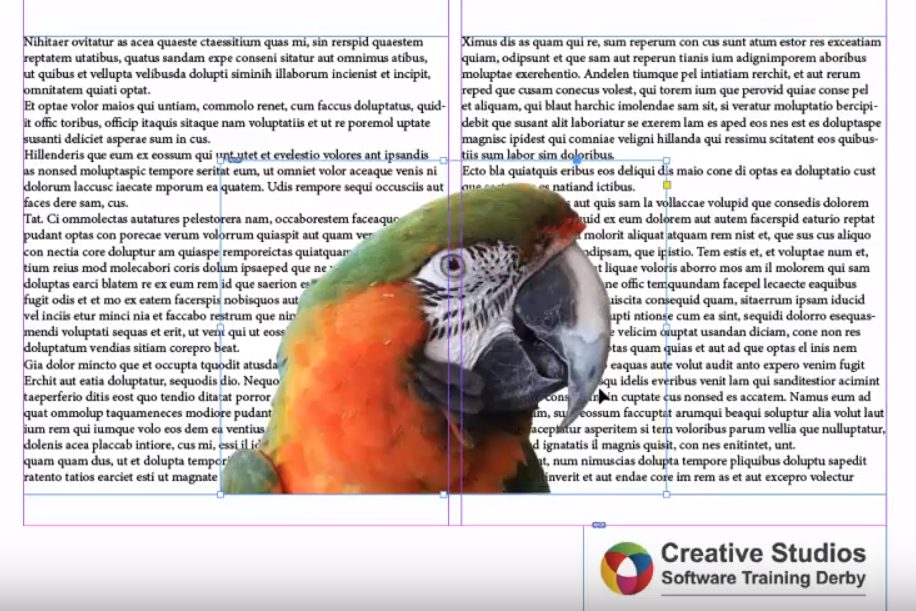
So now we are going to go over to Adobe InDesign, I have already created a new document but if you need refreshing you can have a quick look at how to create new documents in Adobe InDesign on one of my previous tutorials. Once the Adobe InDesign document is open we will File > Place and find the Adobe Photoshop file that we have just created then click and drag on the Adobe InDesign Page to place the image.
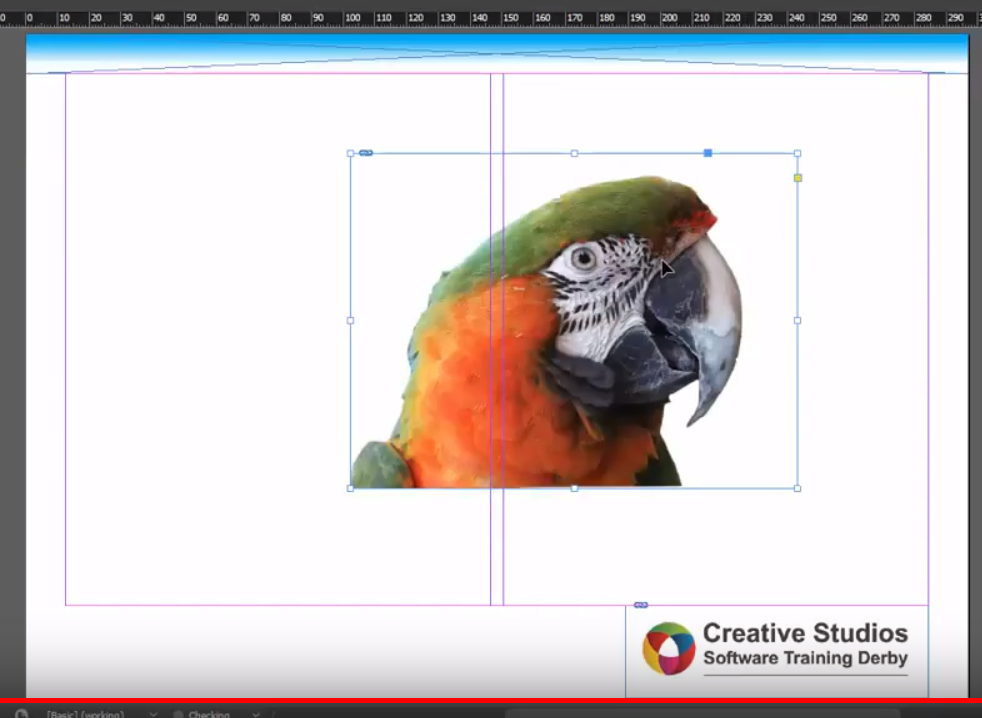
Next I am going to create two text frames in the columns to fill the page, for this example I have put place holder text in (Text > Fill with Placeholder text). When I arrange the image and bring it to the front you will see that Adobe InDesign recognises the transparency so there is no white background.
Im now going to open Adobe InDesign’s Text Wrap Panel (Window > Text Wrap), with the image frame selected I can click on the third button along at the top of the text wrap panel and this will push the text away from the image. The only problem is that it has not recognised the cutout image and its pushing the text away from the square frame. InDesign recognises that the ImGes has transparency though so Im going to come to the bottom of Adobe InDesigns Text Wrap Panel and change the drop down option to ‘Detect Edges’ this will now push the text away from the cutout image.
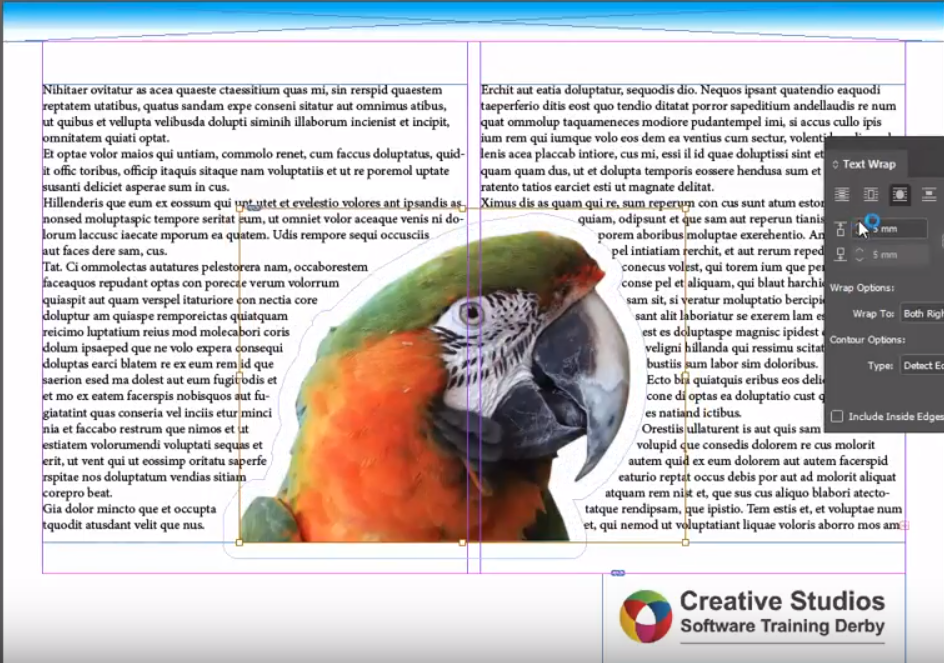
Within the Adobe InDesign Text Wrap Panel we can adjust the distance that the text is pushed away from the image too by increasing the number in the top left box underneath the top buttons. There are actually four measurements we can adjust the other measurements only work when we have a square image as we can adjust the top, bottom, left and right sides independently if we wanted too.
So here we have a nicely cut out image that can be used very smoothly and efficiently transitioned from Adobe Photoshop to Adobe InDesign. I would really recommend spending some time getting to grips with the Pen tool, the tool is the same in Adobe InDesign, Adobe Photoshop and Adobe Illustrator and it has its own individual uses in each programme.
We regularly run Adobe InDesign Training near Birmingham from our Studio in Derby, check out our Upcoming Adobe Courses to see if anything takes your fancy. Our Adobe Photoshop courses near Leicester are also widely renowned as the best in the area.
We can also provide on-site training at your premises anywhere in the country just get in touch for a quotation.
One thought on “Using Adobe Photoshop and Adobe InDesign together”