
 Click here to see all of our Software Training Courses
Adobe InDesign Interactive PDF image galleries.
When exporting an interactive PDF from Adobe InDesign you can add a number of interactive elements such as hyperlinks, forms buttons etc and also a really great effect that enables you to have a gallery of images all on the same page.
To begin this process in Adobe InDesign first of all im going to place the correct number of frames on to the page, in this instance I want 5 images so I’m going to place 5 blank frames all exactly the same size on to my Adobe InDesign page.

Then I’m going to File > Place and choose 5 images and place them in to the frames that I have already created. Then I am going to adjust the frame fitting so all the images sit inside the frame cropped correctly to the portion of the image that I want to be visible. These will all form the separate images that we rotate around in the gallery.
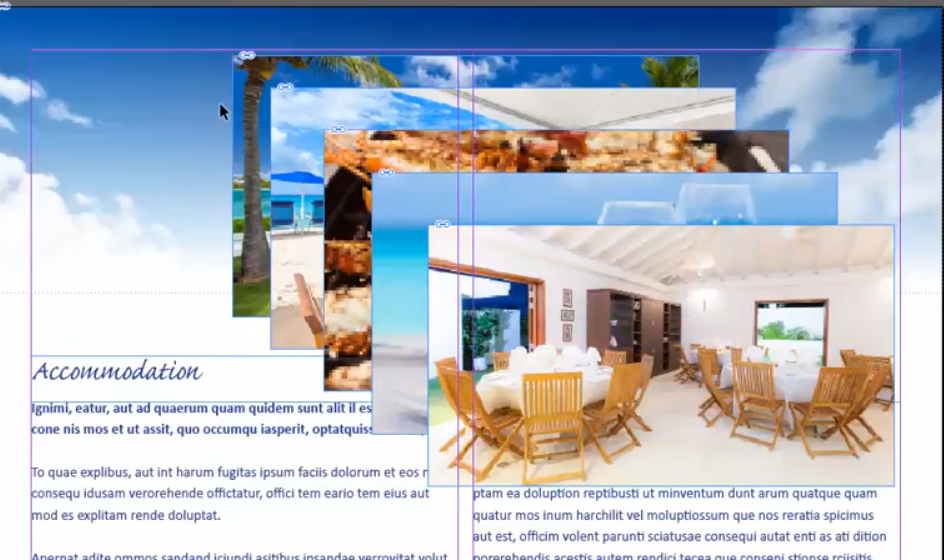
Now I need to make sure that all the images are placed exactly on top of each other on my Adobe InDesign page, this can be done just by moving them on top of each other and using the smart guides or you can select them all together and use the alignment buttons in your control bar to position them exactly on top of each other. Don’t worry about the order as we can adjust which image is shown when we create the gallery later on.
Now we are going to open the Adobe InDesign Object States Panel (Window > Interactive > Object States) then drag over all the image frames so they are selected together, when they are all selected click on the New Object States button at the bottom of the panel, this will put a dashed line around the group of images and also generate a small thumbnail of each of the images in the Object states panel.
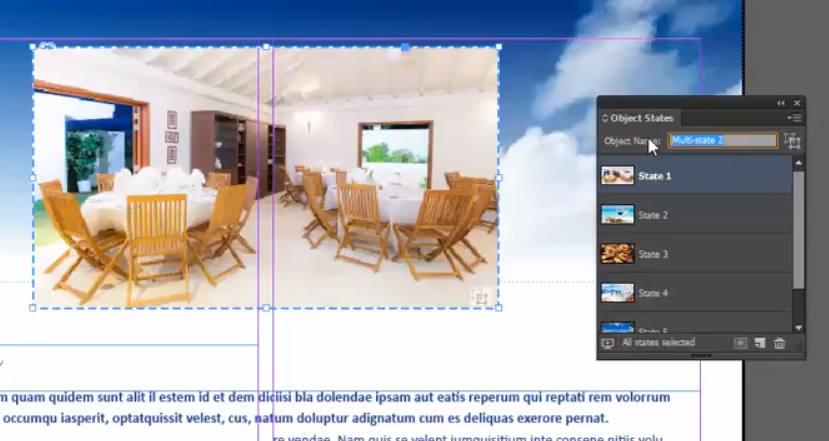
You can now adjust the order that the images are going to appear by dragging them up and down in the Adobe InDesign Object states panel, the top image will be the first and next one down second etc…
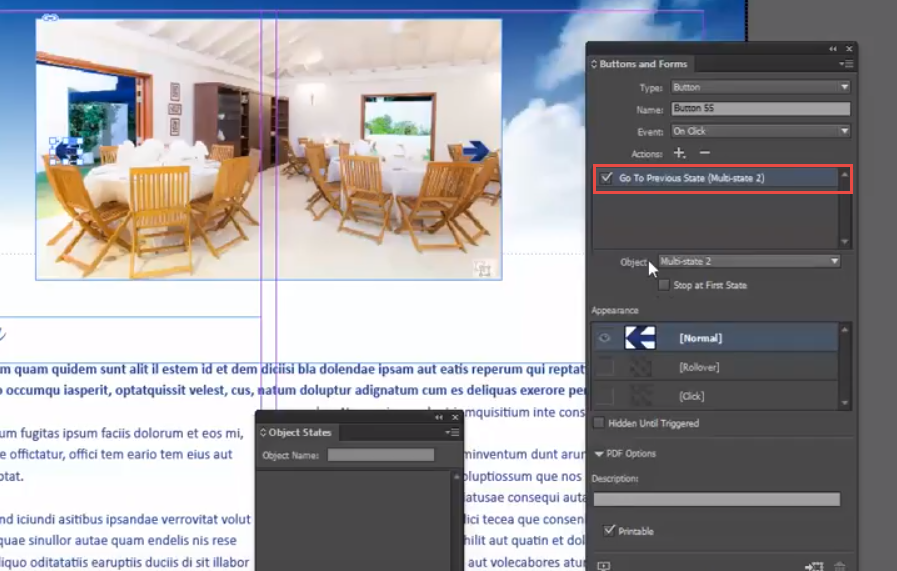
We now need to create some Adobe InDesign Interactive buttons to control the state changes when we export to PDF. Go to Window > Interactive > Buttons and Forms.
We need to create two buttons one for each side of the gallery to go left and right. Any frame can be converted in to a button just by selecting it and clicking on the 'Convert to Button' button in the bottom of the Buttons and Forms panel, in this instance I have created two arrows.
The left Arrow I am going to have the action as 'Go to previous state' and the right arrow as 'Go to next state'.
This is where it gets a bit tricky, you would think that if we exported this file as an interactive PDF directly from Adobe InDesign that it would open in Adobe Acrobat and work perfectly but unfortunately this isn't the case....
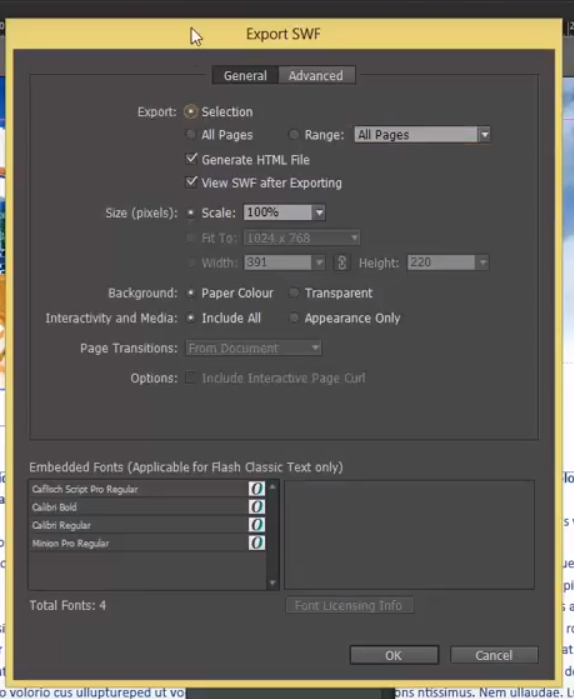
To make this Interactive Gallery work we need to first export the Multi state object and the buttons as a Flash SWF file and then place it back in to the document as a SWF file, it will then work when we export as PDF.
So go to File > Export and choose Flash SWF as the file type then very importantly just choose 'Selection' in the Flash SWF options.
Once this has generated go back to your Adobe InDesign page and put the Multi state object to one side, then go to File > Place and place in the SWF file we have just generated, we then need to open our media panel, Window > Interactive > Media and with the SWF file selected click the tick box that states 'Play on Page Load' this will now work in our Adobe PDF when we export as an interactive PDF from Adobe InDesign!

We regularly run Adobe InDesign Training near Birmingham from our Studio in Derby which can cover many other interactive elements that can be placed in to PDF documents direct from Adobe InDesign, check out our Upcoming Adobe Courses to see if anything takes your fancy.