
 Click here to see all of our Software Training Courses
 When we think of Adobe Illustrator, it’s normally graphic design that jumps to the forefront of our minds. Indeed, that is how the tool is more often than not promoted by Adobe itself, so it’s only a natural connection to make.
However, such is the power, complexity and versatility of the program, Adobe Illustrator can and is in fact used for many different design projects that perhaps fall outside of what we generally consider to be ‘graphic design’.
One such usage can be found in the realms of fashion design, where indeed Adobe Illustrator is used to great effect.

One of the most fundamental skills that fashion designers need is to be able to create flat sketches, more commonly known as ‘Flats’. Flats are essentially simple black and white drawings of garments that can be used to then fill out styling and construction details for manufacturers to follow.
Knowing how to create and use flats is essential knowledge for the fashion designer using Adobe Illustrator. And so in this blog I want to show you a few methods for drawing and using flats with Illustrator.
Let’s get to it.
Using Adobe Illustrator For Fashion Design: How To Draw Flats
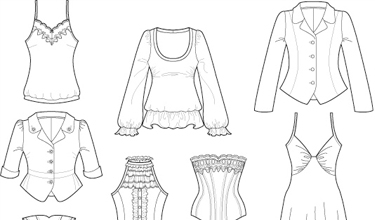
The above image shows you what we’re talking about in terms of flats. They are vector images, and indeed there are many different methods that can be used for drawing them. You will of course discover your own preferences over time, but I want to walk you through a few simple techniques to get you started.
Abutting Paths
You will need to create some perfectly abutting paths on your flat when, for instance, working with a sketch of a blazer, blouse or t-shirt between the bodice on the armhole, and for this purpose you can use a method known as Pathfinder Divide.
Take a look at this very simple flat of a polo shirt below.
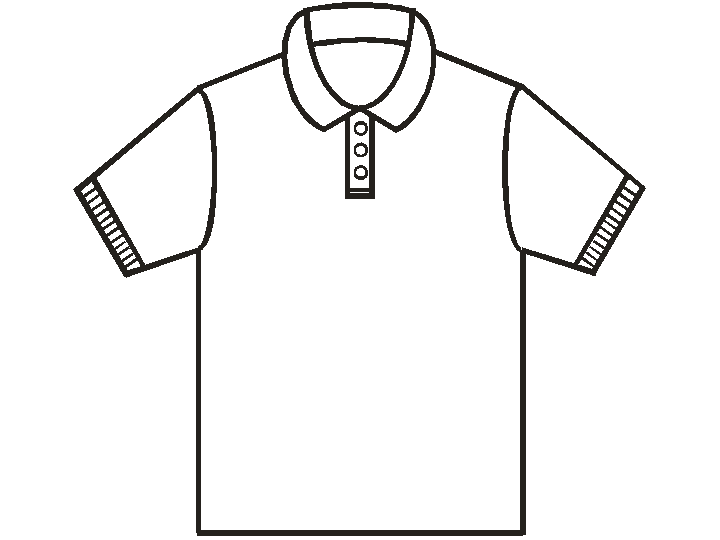
You can see here that, once the whole bodice and sleeve has been drawn as one object, the sleeves have been sectioned off very neatly. This of course will be essential when it comes to manufacturing the shirt.
So, we must create a path that divides each sleeve from the bodice essentially creating three separate objects from the original flat. To do this, you must first create a path that will in effect represent the armhole seam. Make sure when you create this path that it overlaps both edges of the garment – i.e. at the underarm and at the shoulder – and that your path has a stroke but no fill.
Now we must divide each section. Using the Pathfinder panel, select the path and then click Divide. You will notice that the overlapping portion of the path vanishes, which indicates that the bodice and sleeve have been divided into separate objects.
The Shape Builder Tool
An alternative method of creating perfectly abutting paths is to make use of Adobe Illustrator’s Shape Building tool.
On the polo shirt, you will notice that there is some contrast at the ends of the sleeves, and the Shape Builder Tool can be utilised to fashion this. Ensuring that your path has a stroke but no fill, create an overlapping path on the sleeve where the ‘cuff’ will be.
Now, select both the upper part of the sleeve and the path. Using Shift + m, locate the Shape Builder tool and click once on the ‘cuff’, once on the path, and once of the sleeve. This will now leave you with two separate shapes – one the sleeve, and one the ‘cuff’.
From here you will now need to manually delete the ends of the path, and you can do so simply by holding down the Alt key with the Shape Builder tool and clicking on those stray ends.
Overlapping Shapes
Abutting paths aren’t always the best way to achieve your desired effect for every element of the garment.
Look again at the polo shirt above and notice the collar. This element was added after the sketching of the original flat, and was done so using stacking to order objects and hide them underneath one another.
With the original flat on-screen, with Smart Guides turned on (View > Smart Guides) the collar was drawn on top. Then, simply enough, the separate objects are arranged using the Layers panel, or Object > Arrange.
Reflect
When creating the flat for a symmetrical garment, it of course makes best sense to draw only one half and then copy, reflect and join it to the other half to ensure symmetry is achieved.
Once you’re happy with the design of the half, and have added any extra elements like stitching of pockets, select the entire half of the flat using the Selection tool. Now locate the Reflect Tool and, holding Opt/Alt, click on the centre front axis – which will be simple to locate if you have Smart Guides on – and the Reflect dialogue box will open. Ensure that Preview is on, and click OK. Now all you need to do is to ensure all of the anchor points are joined along the centre front axis, and your perfectly symmetrical flat is complete.
Easy enough, right?
Want to learn more about how to use Illustrator for fashion design? We’ve got the exact course for you.
Creative Studios’ CAD For Fashion and Textile Design Course is a firm favourite amongst those wanting to learn new design skills for the fashion industry. Book your place today!