
 Click here to see all of our Software Training Courses
In the digital age, it pays to ensure that at least one person on your team has a grasp of the fundamentals of using Adobe products. Where once businesses would send out dry, generic cards over the holiday period wishing customers a properous New Year, these days a more personal touch is not only more pleasent, but it often expected.
And what better way to see in 2016 than by sending images of the team hard at work or play? Today, we’ll be looking at how to edit holiday snaps with Photoshop so that you can present your customers with a more personalised and friendly face going into the coming year.
Opening up Photoshop for the first time can feel – especially to the uninitiated – somewhat intimidating. Given the somewhat bewildering array of buttons, links, symbols, drop-menus and more, it can be difficult to know where to start.
Firstly, don’t worry. Whilst Photoshop and many other Adobe products appear difficult to use, we’re about to teach you the basic principles and tools to make your holiday snaps look better than the average Joe’s.
And from a business perspective, what better way to wish your loyal customers a prosperous New Year than to send out personalised cards of the team and office along with a special offer. Done well, this will help to cement trust in your organisation, improve business relationships and start 2016 on a big positive.
Getting Started – Open up Your Image
So first things first you need to open up your image in Photoshop.
There are two ways of doing this:
• Drag your image from its location (ie desktop) into Photoshop – voila!
• The manual way – file – open – select image

Working with Layers
Layers are one of the most important tools in Photoshop. Using this tool can save you lots of time and frustration. Ever started to draw something or build something and realise you’ve made an error and have had to start all over again?
Layers can combat these problems.

The image above shows your Layers tab. After opening an image a background layer appears. This is your primary layer. Drag this layer to the symbol indicated by the arrow. This will create a duplicate layer called background copy; this is the layer you will work on for your first edit.
Shadows and Highlights
Now we have the very basics out of the way, we can start to look at some great, yet simple, editing techniques in Photoshop.
At the menu bar at the top of your screen click on Image then Adjustments and Shadows/Highlights.

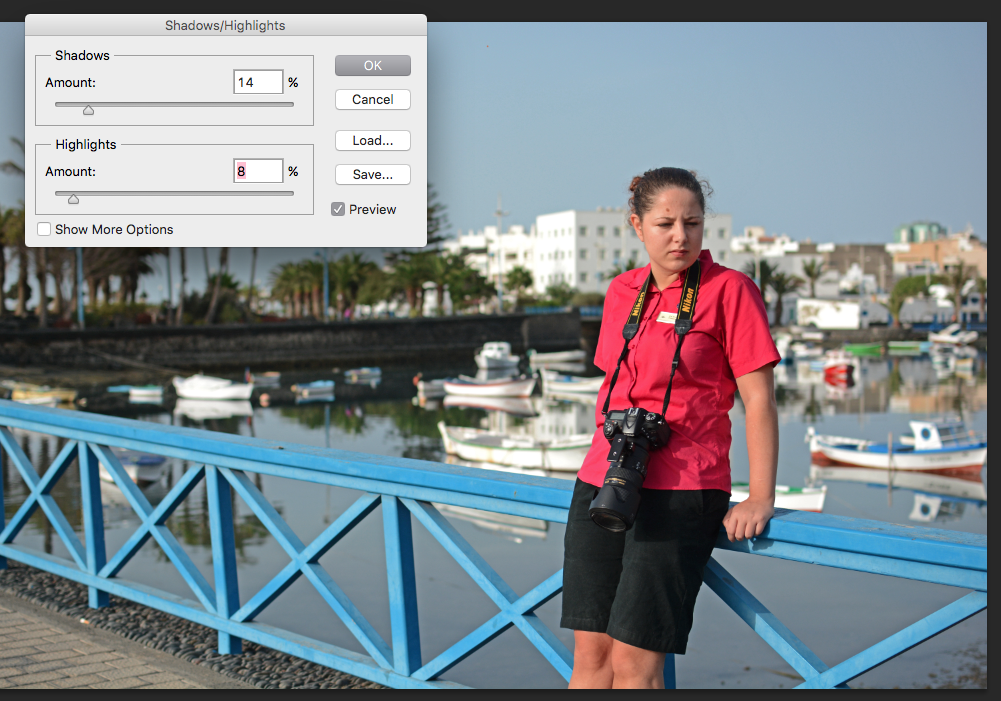
Next a box with sliders will appear. The above images display how I have used these to make enhancements.
Enhancements
On the left, shadows can be seen on the face, shorts and in the background. Blocks of black tones can be uneasy on the eye therefore this technique is handy to introduce detail. Simply slide the shadow slider to the desired position making sure the box named Preview is ticked. Toggle between the previous image and the edited version, enabling easy comparison (this can also be achieved by using the eye symbol on the layer copy made earlier). You don’t want your image to look like your dog has stepped on the keyboard making a mirage of ridiculous, unrealistic, colours.
The image at the bottom demonstrates the differences and enhancements note how it gives a more natural appearance. Don’t be afraid to experiment with this and see what works for you.
Cropping
On the left hand side of the window is your tools tab, made up of lots of mysterious symbols. You may be happy to know the arrow below indicates the only one you need to concentrate on for this step.
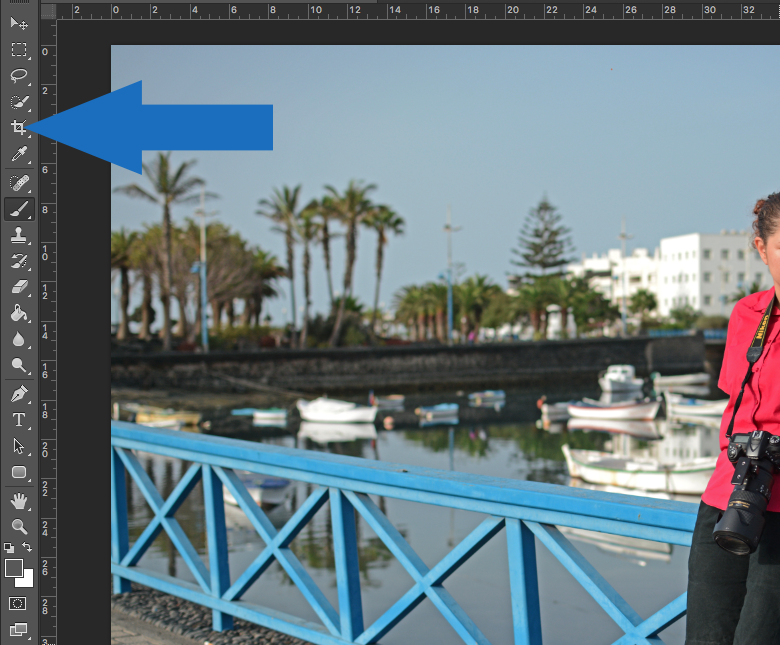
This is your crop tool.
Selecting this creates a box around your image with bold black lines on the edges. Simply hover over these and your cursor symbol will change to an arrow, allowing you to drag the edges to the desired position. Take note however that this will change the size and dimensions of the image. Therefore if you need specific dimensions you can use the sizing boxes at the top of the window shown with, yes, more arrows in the image below.
This will automatically detect the image size and crop for you; you can reposition the image within the box by clicking and dragging to the preferred placement.
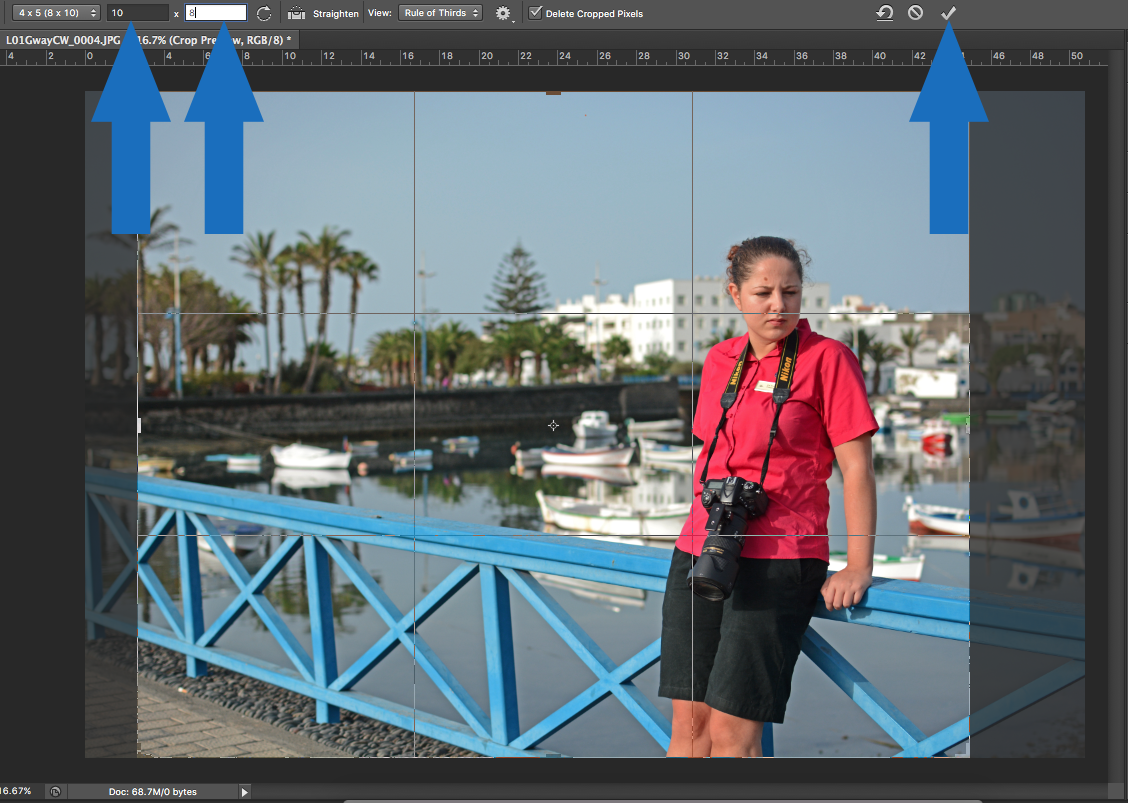
Once you’re happy with your image, either hit the return key on your keyboard or click on the tick button in the top right hand side of the window.
Brightness, Contrast and Levels
If you really want the colours in your image to pop, then this step is for you.
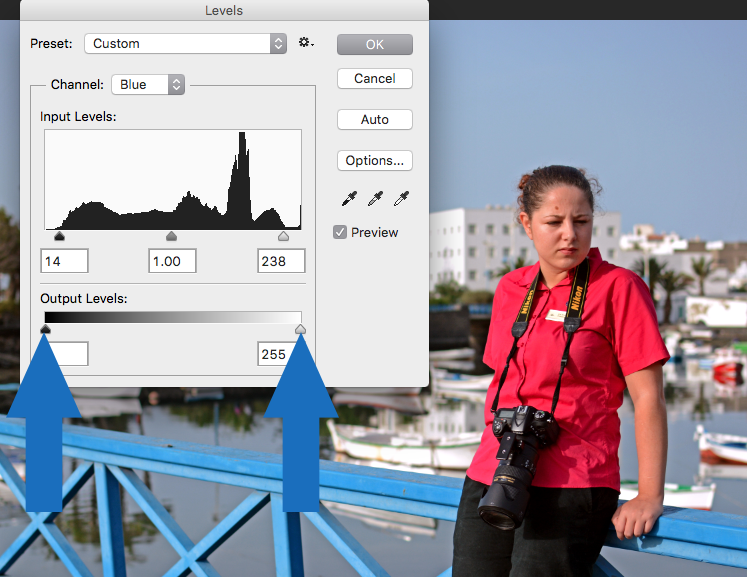
Duplicate the copied layer as demonstrated previously. First, open up the levels box which follow the same path as where shadows and highlights live: Image > Adjustments > Levels.
Next, the drop down menu above the graph (aka histogram) show your colour paths. It should automatically show RGB (red, green and blue). The arrows on the sliders below the histogram are there for you to adjust the colour intensity, midtones and highlights.
Select a colour, noting the histogram change, slide the sliders to the start of the spike shown.
Next choose a different colour and repeat the step; this will clear noise and intensify the colours. The sky is now a bluer colour and the pink shirt seems to pop.
For the contrast and brightness, again, it can be found on the same menu, but this time the very top one named Brightness/Contrast.
You can really play around with these and get creative, if you like. Brightness is self explanatory, whereas contrast can either give your image a more three-dimensional feel and depth, or you can create muted colours for a moodier effect. In the adjustments menu there is also a Desaturate option which can be used to transform the image to monochrome. The choice is yours and is really down to personal preference and desired effect.
Patching
Patching is a great little tool and something many people use a lot. It can be used to rid that temporary blemish on a face, make dust speckles vanish, or make a bird simply disappear from the sky.
Revert back to the tool palette on the left hand side of the screen and select the patch tool. For this, you will need to hold down the mouse button and select it from the drop down menu. There is another drop down menu at the top of the window, make sure it is set to content-aware instead of normal.

Now, draw around the desired area that you want to remove. Once selected, click on the inside area of the patch and drag to a similar area in the image (for example, if something is in the sky, drag to another blank area of the sky).

Above we’ve drawn around the tripod leg to the right of the image and then we can simply remove with the patch tool.

Red-Eye Tool
Finally, if you find your images are full of red-eyed devils, simply use the red-eye tool located in the same menu as the patch tool.
Create a box around the eye by dragging the cursor and it will automatically detect the red area of the eye – perfect for the morning after the office party when the team may look a little less at their best.
So there you have it, simple editing techniques you can use for those holiday and office party snaps. Experiment and see what works for you by following these basic steps.
This is of course a very simple introduction to touching up images in Photoshop, which is a very powerful program that can also be fun to learn. Once you begin to become more comfortable with using Photoshop, you’ll soon find yourself delving deeper into the Adobe family and wanting to learn even more.
Want to learn more about using Photoshop and images? Your business can save £££s and improve the look of company literature by taking a course or workshop with Creative Studios Derby.
Get in touch to see what courses are available and suit your businesses needs today – we have courses to suit every level.